
Tech Tips: Shift Cable & Housing Service

Experiencing shifting problems on the trail and longing for the time when our fresh cables and housing performed in a silky, smooth fashion is a familiar feeling we all share. There are some simple maintenance techniques that can revive your existing cables and housing. I will usually do this process twice a year on my bike: once in the spring and once with the onset of winter. This gives you a chance to really inspect the condition of your cables and housing and replace any pieces as needed. You will soon be on the trail praising your bike’s efficiency.
Modern shift housing (compressionless) is made up of three components: the outer membrane, a layer of parallel steel strands running lengthwise, and an inner plastic liner that the shifter cable runs though. This type of housing is for indexed shifters only and should never be used for brakes because it cannot withstand the compression brake housing endures. The inner liner of the housing provides a smooth surface, so the cable can move without resistance. Lube is not a necessity for smooth shifting, but it can help prevent rust on the cable itself and the exposed strands at the cut ends of housing. Use only a very light lube if any on cables. I use Prolink for this purpose and it keeps things clean without any buildup.

Trimming these frayed housing ends will breathe new life into your shifting performance.
For working on cables and housing there are two tools that are a must have: a good set of cable cutters and an awl (often referred to as a pokey tool). It is well worth the money to invest in a good set of cutters from a bike tool company. Don’t rely on something from your local hardware store. Park, Pedro’s and Feedback Sports all make reasonably priced cutters that will last a lifetime if used properly. A bike specific cable cutter will deliver clean cuts that will make your work go smoothly. For an awl, I have always used a retired spoke that is sharpened on one end. It’s handy to use the bent, anchor end of the spoke to shape a loop and form a handle for your new tool. Your local bike shop could hook you up with a spoke for this purpose if you don’t have one available. Once you have cut a piece of housing, use your awl to make sure the inner liner is open so your cable can pass through freely.
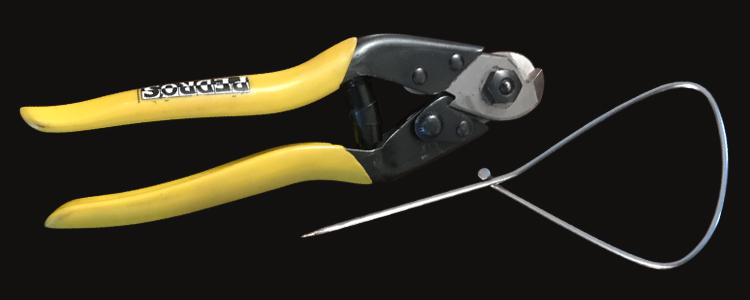
Bike specific cable cutters and a homemade awl from a spoke are a must have.
We have all heard the term cable stretch, when the topic of adjusting shifting after a “break in” period. This term can be a little misleading, since the amount your actual cable can stretch is so slight. What happens over time that affects your shifting has more to do with your housing wearing from all the movement that occurs when riding or settling into the ferrules that act as caps at the ends of the housing. After a bike has spent many hours on the trail the steel strands from the housing can become exposed and extend out from the casing. When you remove the ferrule from the end of the housing, you might be surprised by the length of strands that are exposed. I have seen cases where these strands get pretty long and it certainly affects your shifting. By trimming the housing flush again, the ferrules can fit flush on your housing and increase your shifting performance.
One tricky obstacle to overcome when reusing cable and housing is running the cable back through the housing. This can be especially difficult if the cable has been cut too short at the derailleur. Always try to leave enough length on a cable that allows you to remove the crimped cable end and trim it a bit if necessary. If the end of your cable is frayed, you will experience much frustration getting the cable to go back through the small openings in the housing and ferrules. More than likely you will get a strand of the shift cable that gets out of place and ends up rendering it unusable. So, give that cable the shortest trim you can to get a flush end that can pass through the openings without damage. Reusing a cable is a technique that requires patience as well. Take your time and keep a steady hand. Getting the cable through your ferrules is the biggest challenge. I tend to use a threading motion and twist the ferrule onto the shift cable. You will notice that shift cables are twisted in a single direction. By twisting the ferrule onto the cable, you help ensure that it won’t unravel and make the cable unusable. Be sure to cap your cable by crimping a cable end that will prevent the cable from fraying.

The awl can open housing and always use an end cap. Details and finishes make the difference.
Once your cables and housing are trimmed and reinstalled it’s time to enjoy the fruits of your labor and feel that flawless performance again. With some practice, this process can be a speedy means of reviving your bikes and giving your cables and housing a longer, happier life. Just remember to remain patient, keep a steady hand, and have a spare shift cable available just in case things go wrong. There is a learning curve for bike service that comes with experience, just as there is with riding trails. No one was perfect right out of the gate. Time and practice always pay off though, even when mistakes happen. Now, let’s get out and ride!

Let's Ride!